Quick start
For the quick start first af all you need to follow these simple steps:
After these steps you can upload your videos on YouTube and embed any YouTube video/playlist/channel to your website.
How to embed YouTube video to the page
To embed YouTube video simply use this shortcode inside article, module or even template html following shortcode:
[mx_youtuber type="video" id="5vZ4lCKv1ik"]
More about how to use shortcodes and how to get a video ID of the desired video you can read in the "Shortcodes" section.
YouTube playlists and channels are embeding almost the same way. Which shortcodes and attributes you will need for this, please also read in the "Shortcodes" section.
How to upload a video on YouTube from the website
Go to the edit content or module page, under the content editor you will see a "Upload video on YouTube" button, click it.
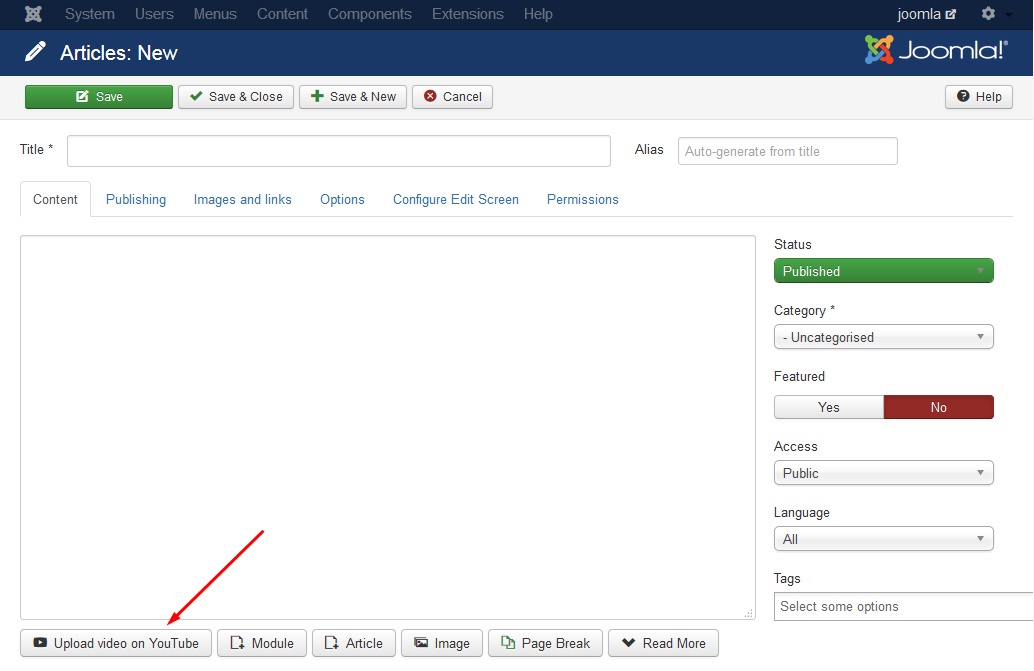
If you don't see this button, you probably have not activated "YouTubeR button" plugin.
In the popup window authorize you YouTube account by clicking "authorize" button.
Then click "Upload video" button in the upper top corner:
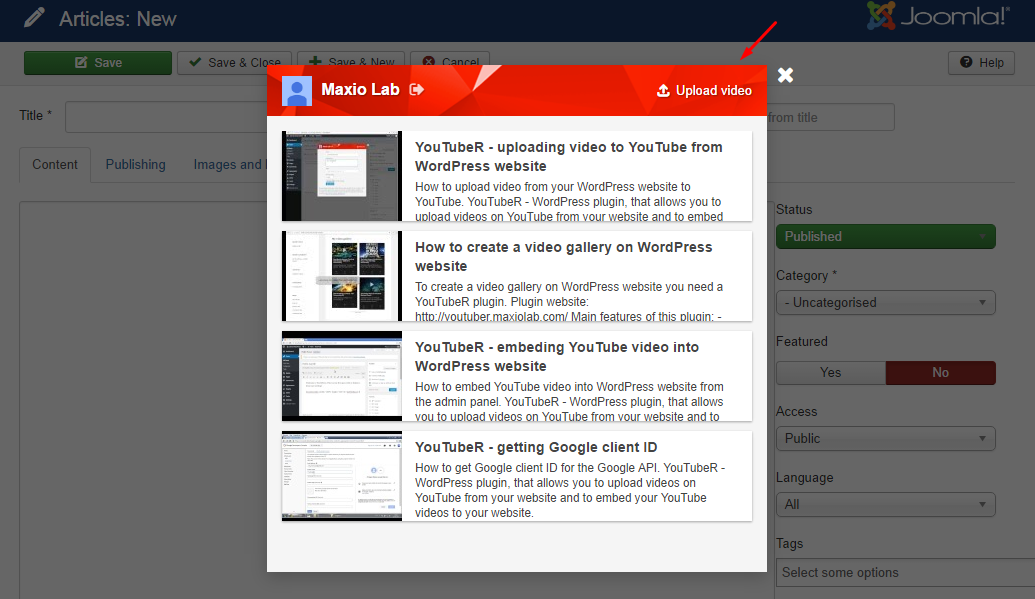
Fill in all the fields and choose your video file to upload and click "Upload" button.
When video will be uploaded you will see it in your videos list without thumbnail. Thumbnail will be generated by YouTube later. As soon as it will be generated you will see it in your videos list.
Installation
To install the plugin go to Extensions > Manage > Install, choose "Upload Package File" and select the youtuber.zip file from the downloaded package file, be sure not to upload the whole downloaded package, only the youtuber.zip.
After the upload, activate the plugin "YouTubeR" in Extensions > Plugins and congratulations, the plugin have been installed.
You can also Activate the "YouTubeR button" plugin to be able to uplad videos to YouTube from your website.
Update
Updating this plugin is important due to bugfixes and new features. To manually update the plugin follow these steps:
- Go to your codecanyon account -> Downloads section
- Click "Download button" of the YouTubeR plugin
- Download zip archive and extract its contents. You will see there documentation folder and zip archive with the plugin itself.
- Extract this archive. There will be "youtuber.zip" file.
- With this file go through the installation process.
- You don't need to uninstall the plugin before update.
To receive notification about updates you need to go to your codecanyon account -> Downloads section and check the checkbox as shown on the screenshot.
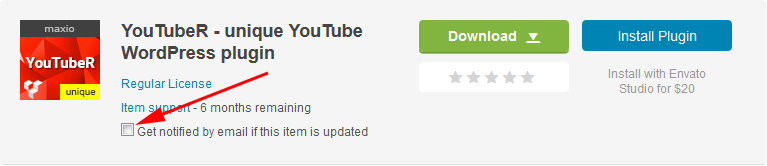
When new version of the plugin will be available, you will receive a notification email from Codecanyon.
Google API keys
First of all, go to Extensions > Plugins and open "YouTubeR" plugin.
To use this plugin, you need a valid Google API keys. You can get them with a Google account on Google Developers Console.
The Google API is free with a limit, but for a normal use you don't have to worry at all, currently, for the YouTube API data the limit is of 50,000,000 units/day.
On the Google Developers Console site, click on the Create project button, set any name for it and wait until it's created.
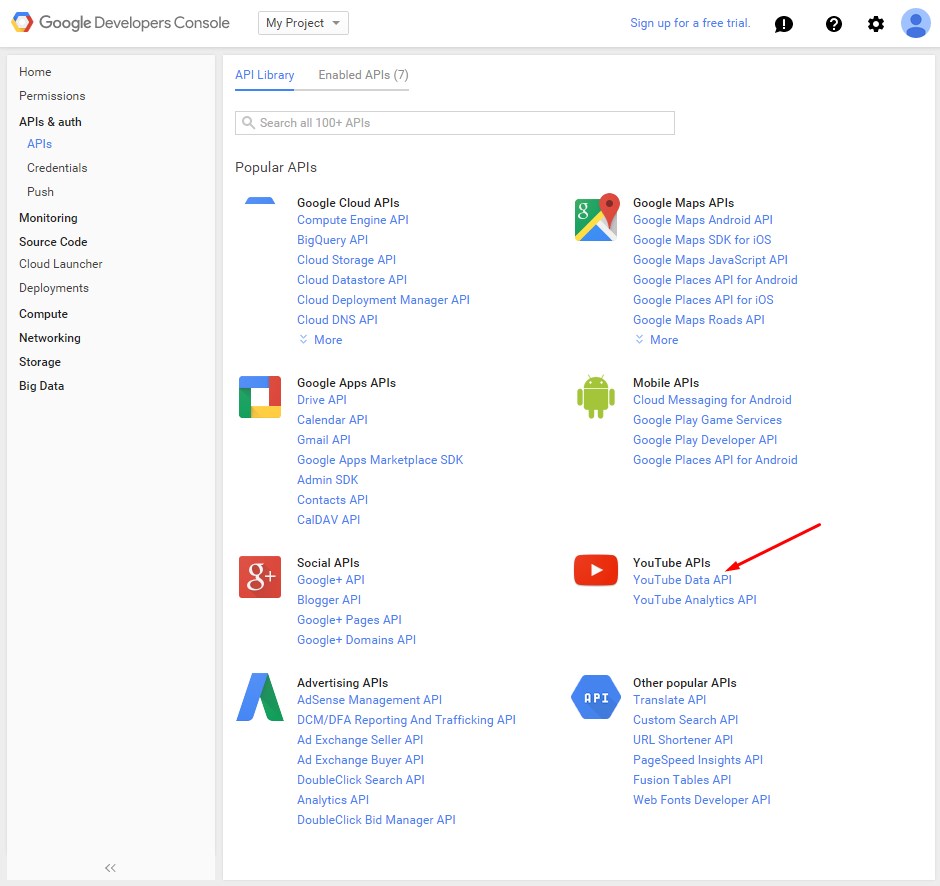
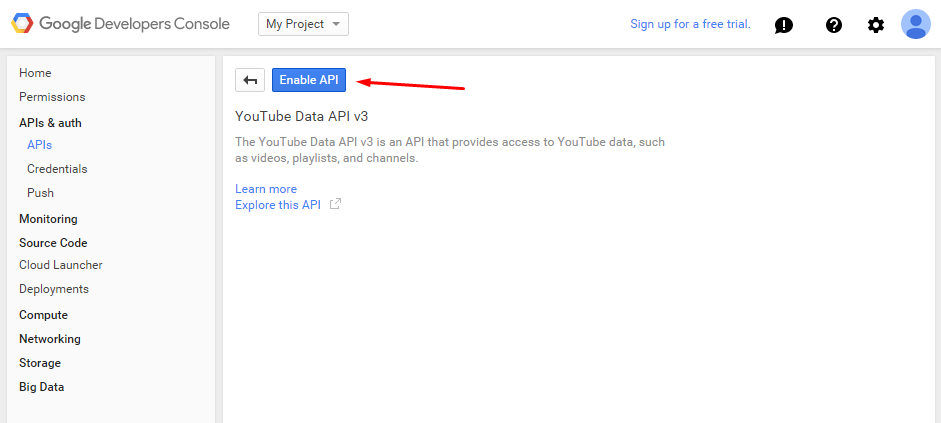
First we need to enable the YouTube Data API so go to APIs & auth > APIs, click on the YouTube Data API and on the Enable API button.
Then go to APIs & auth > Credentials.
Here wee need 2 diferent keys: Browser key and Web application Client ID.
1. Obtaining a Browser key
Click on the Add credentials button.
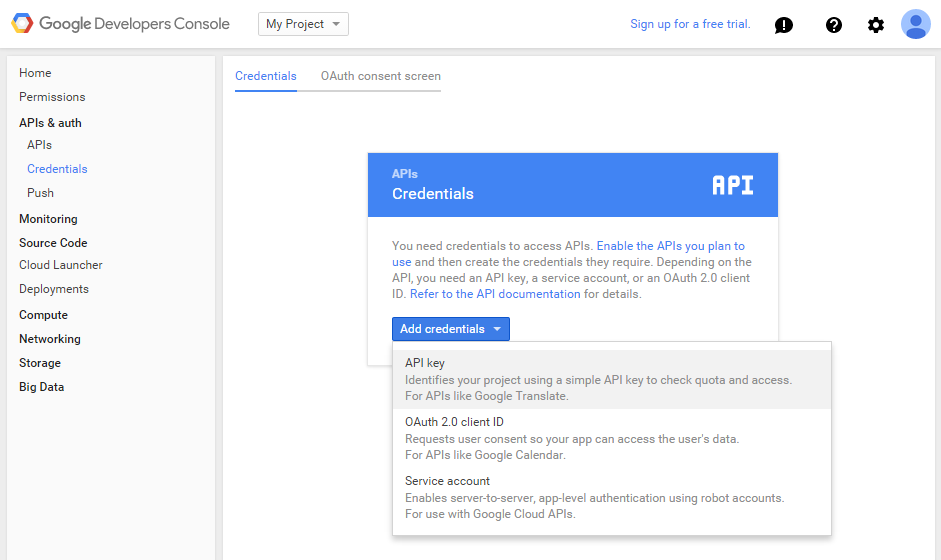
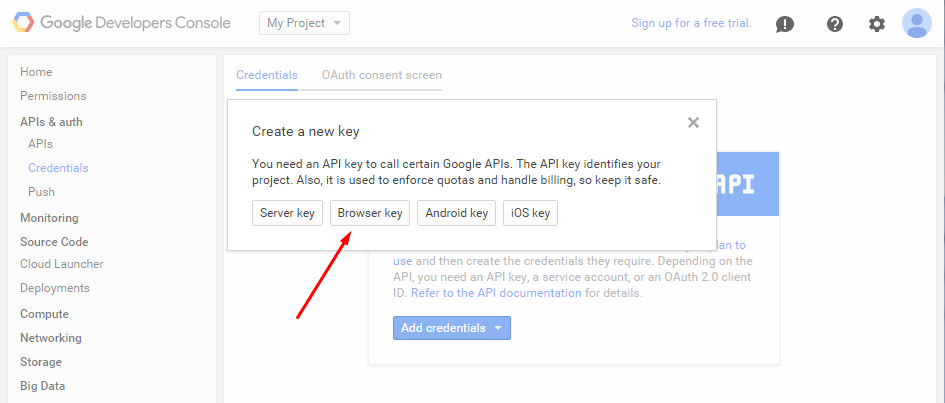
In the modal choose the API key option, then click Browser key button.
This step is optional, you can set on the HTTP referrers field all the domains you want the API to accept queries from, for example like this: *.example.com/* for the example.com domain.
In some cases we've found Google will throw an error from the domain even it is correct, in that cases we suggest you to leave the refer field empty to allow from any domain. The API key won't be public anytime in your WordPress so you don't have to worry at all.
Ok, after all, click on the Create button, your API key will be right there.
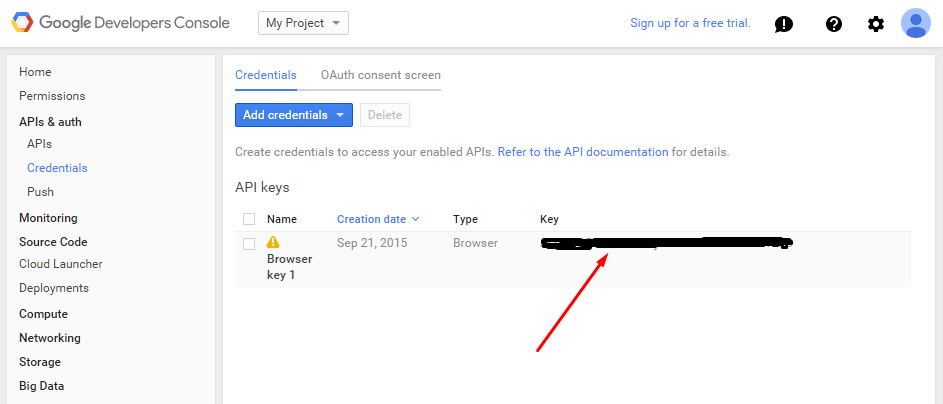
Copy the API key from the Google Developers Console and paste it in the YouTubeR settings page on your WordPress site and save changes.
2. Obtaining a Web application Client ID
Click on the Add credentials button and choose OAuth 2.0 client ID option.
This step is optional, click the Configure consent screen. If you don't have this button, then you have already configured "consent screen". Fill in the required fields and press save and you're done configuring consent screen.
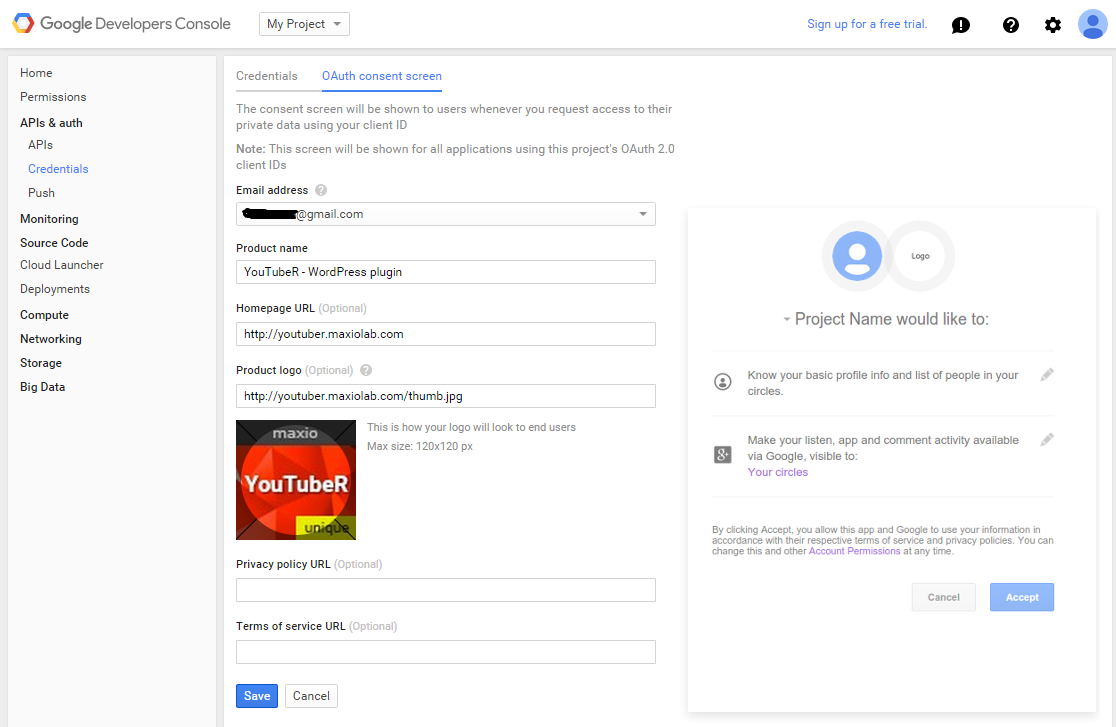
Choose Web application and fill in the name of your application (it can be whatever you want).
Then fill in Authorized JavaScript origins - these are URLs of the websites where you will use YouTubeR plugin.
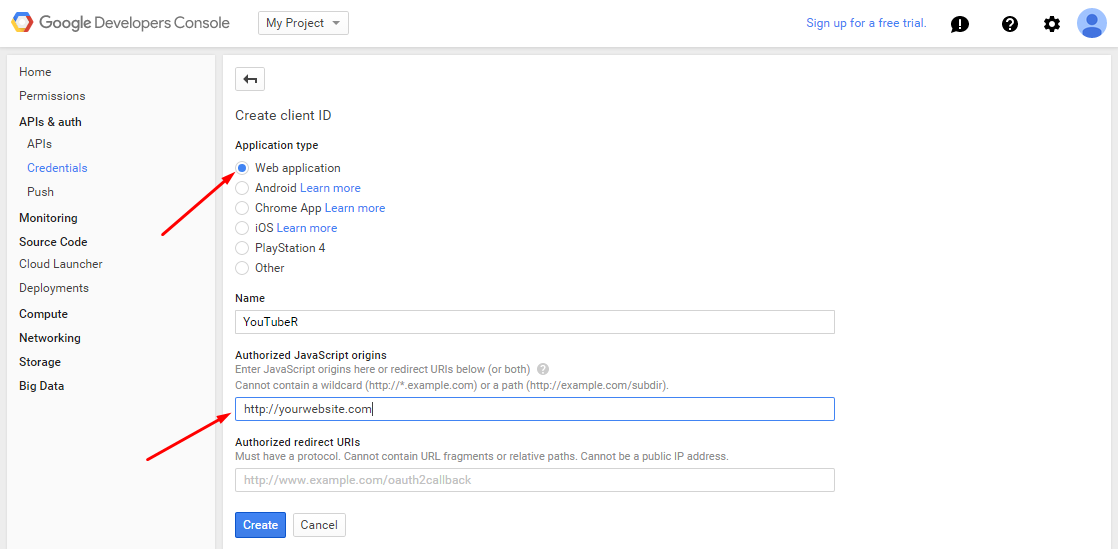
Click "Create" button and you will see your client ID.
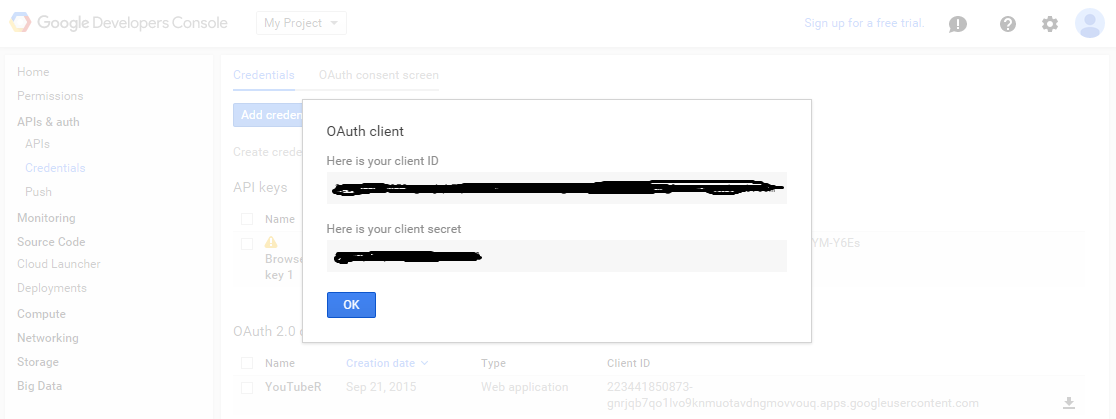
You guessed it! Copy the client ID from the Google Developers Console and paste it in the YouTubeR settings page on your WordPress site and save changes.
Perfect! You're done! Now you can start with the shortcodes.
Shortcodes
To display YouTube videos use our amazing shortcodes.
Video
The video shortcode will display a single video with it's info.
To use it you just need the Video ID, to find it just check a normal YouTube url:
https://www.youtube.com/watch?v=oxgnlSbYLSc
In this case the Video ID is oxgnlSbYLSc, and the shortcode is:
[mx_youtuber type="video" id="Video ID"]
Playlist
To print videos from a selected playlist you'll need the Playlist ID, to obtain it you have to check the url on YouTube again, so for example:
https://www.youtube.com/playlist?list=PLivjPDlt6ApQ8vBgHkeEjeRJjzqUGv9dV
This is the url of the one of National Geographic playlists, and the playlist ID is PLivjPDlt6ApQ8vBgHkeEjeRJjzqUGv9dV.
So the shortcode goes like this:
[mx_youtuber type="playlist" id="Playlist ID"]
Channel
The channel shortcode will display all the channel info & videos.
To use it you just need the Channel ID, to obtain it you have to check the url on YouTube again, so for example:
https://www.youtube.com/channel/UCpVm7bg6pXKo1Pr6k5kxG9A
This is the url of the National Geographic channel, and the Channel ID is UCpVm7bg6pXKo1Pr6k5kxG9A.
So the shortcode goes like this:
[mx_youtuber type="channel" id="Channel ID"]
Shortcode parameters
Using these parameters in YouTubeR shortcodes allows you to customize how videos and galleries will look like (some parameters are not available in the single video shortcode).
| Parameter | Possible values | Description |
|---|---|---|
| id | - | YouTube video/playlist/channel ID |
| type | video / playlist / channel | Type of content to display. In dependency with id |
| videos | - | Video IDs separated by comma, if you want to display specific videos as a playlist. Valid only for playlist |
| display | title,date,channel,description,meta | Keys of elements sepparated by commas of the parts of the video to show, set to none to only display the video thumbnail |
| mode | lightbox / embed / link | Type of embeding the video |
| theme | Check the themes section | The template which will be applied |
| size | default / medium / high / maxres / standard | The size of the video thumbnail |
| width | number | The width of the video (can be in %). Valid only in "embed" mode |
| height | number | The height of the video (can be in %). Valid only in "embed" mode |
| cols | number | Number of columns of the video list in playlist or channel |
| rows | number | Number of rows of the video list in playlist or channel |
| responsive_limit | lg / md / sm / xs | The size of the user device on which columns will collapsed into one column to be responsive. Respectively: large, medium, small, extra-small |
| load_more | true / false | Show or hide "Load more" button to load more videos from the specific playlist or channel |
| load_more_text | Load more | Text for the "Load more" button |
| infinite_scroll | true / false | Turns on automatic "Load more" videos on scrolling down to the end of the video list |
| max_words | number | Limit the maximum number of words to show in the video description |
| suggested_videos | true / false | Show suggested videos when the video finishes |
| order_by | default / date / views / likes / comments | Ordering videos by given attribute. Ordering will be done only within visible part of the list. |
| order_dir | asc / desc | Direction of the ordering |
| ytp_params | Check Google Developers website | YouTube player parameters. Valid only in "embed" mode. Example: autoplay=1&loop=1 |
| playlist_id 1.31+ | - | Default playlist ID to show. Valid only for channels |
Themes
YouTubeR comes with some pretty cool templates, this are the current options:
- default
- dark
- flipcards
- circles1
- circles2
You can create your own custom theme for YouTubeR, to do so let's say you set the parameter theme to custom.
[mx_youtuber theme="custom"]
Then you can add your own styles to the gallery with the base class mxYouTubeR_theme_custom.
If you need to customize/overwrite the code of the template you can create a folder html/plg_system_youtuber inside your website theme and another folder inside it with the name of the theme you want, in this case custom.
Copy the original files from media/plg_system_youtuber/themes/default inside the plugin's folder into the html/plg_system_youtuber/custom inside your website theme, you just need to copy the files you want to customize.
The logic of the plugin when searching for a file of the template custom template is as it follows:
- The plugin will look for the file inside the website theme folder
/templates/_WEBSITE_THEME_/html/plg_system_youtuber/_THEME_/ - The plugin will look for the file inside the media folder
/media/plg_system_youtuber/themes/_THEME_/ - The plugin will load the default theme file
/media/plg_system_youtuber/themes/default/